
Holes and zones
Focus a hole or zone from the keyboard, place holes where the front entered each charge, mark the zones the VoD is fitted over, edit them, and undo.
A hole marks where the cable was cut as the detonation reached a charge. A zone is the stretch of trace inside a hole that the analyser fits a straight line to, and its slope is the zone's VoD. Stemming between decks is not a zone and never gets a velocity. Press 1 to focus the first hole, M to place a hole, and N to make a zone from the window you framed.
Focus a hole or zone
Focus picks one hole, or one zone, and everything reads it: the chart frames it, a readout card lists its figures, and the full-screen workspace draws it in its well.
- Press 1 to 9 to focus the holes in firing order. Press the same digit again to step through that hole's zones, then back to the hole.
- Press
Q W R T Y U I O Pto jump straight to zones 1 to 9 of the recording, in time order. E is left out because it edits. - Press [ and ] for the previous and next hole, and { and } for the previous and next zone.
- Click a zone on the Overview or on the Zones track to focus it.
The readout card shows the Planned figures from the hole (depth, stemming, column, primer and VoD) beside what was Recorded. For a hole it adds a row per zone with each zone's difference from the hole (Δ hole). Drag the card by its header to move it out of the way. Details (Enter) opens the hole's details, Edit (E) starts an edit, and the × lets go of the focus and the zoom together.
Esc lets go of one thing at a time: an open dialog first, then a hole you were placing, the ruler, an edit, and then the focus. The zoom stays where it was. In full screen, the press after that leaves full screen.
A hole's details
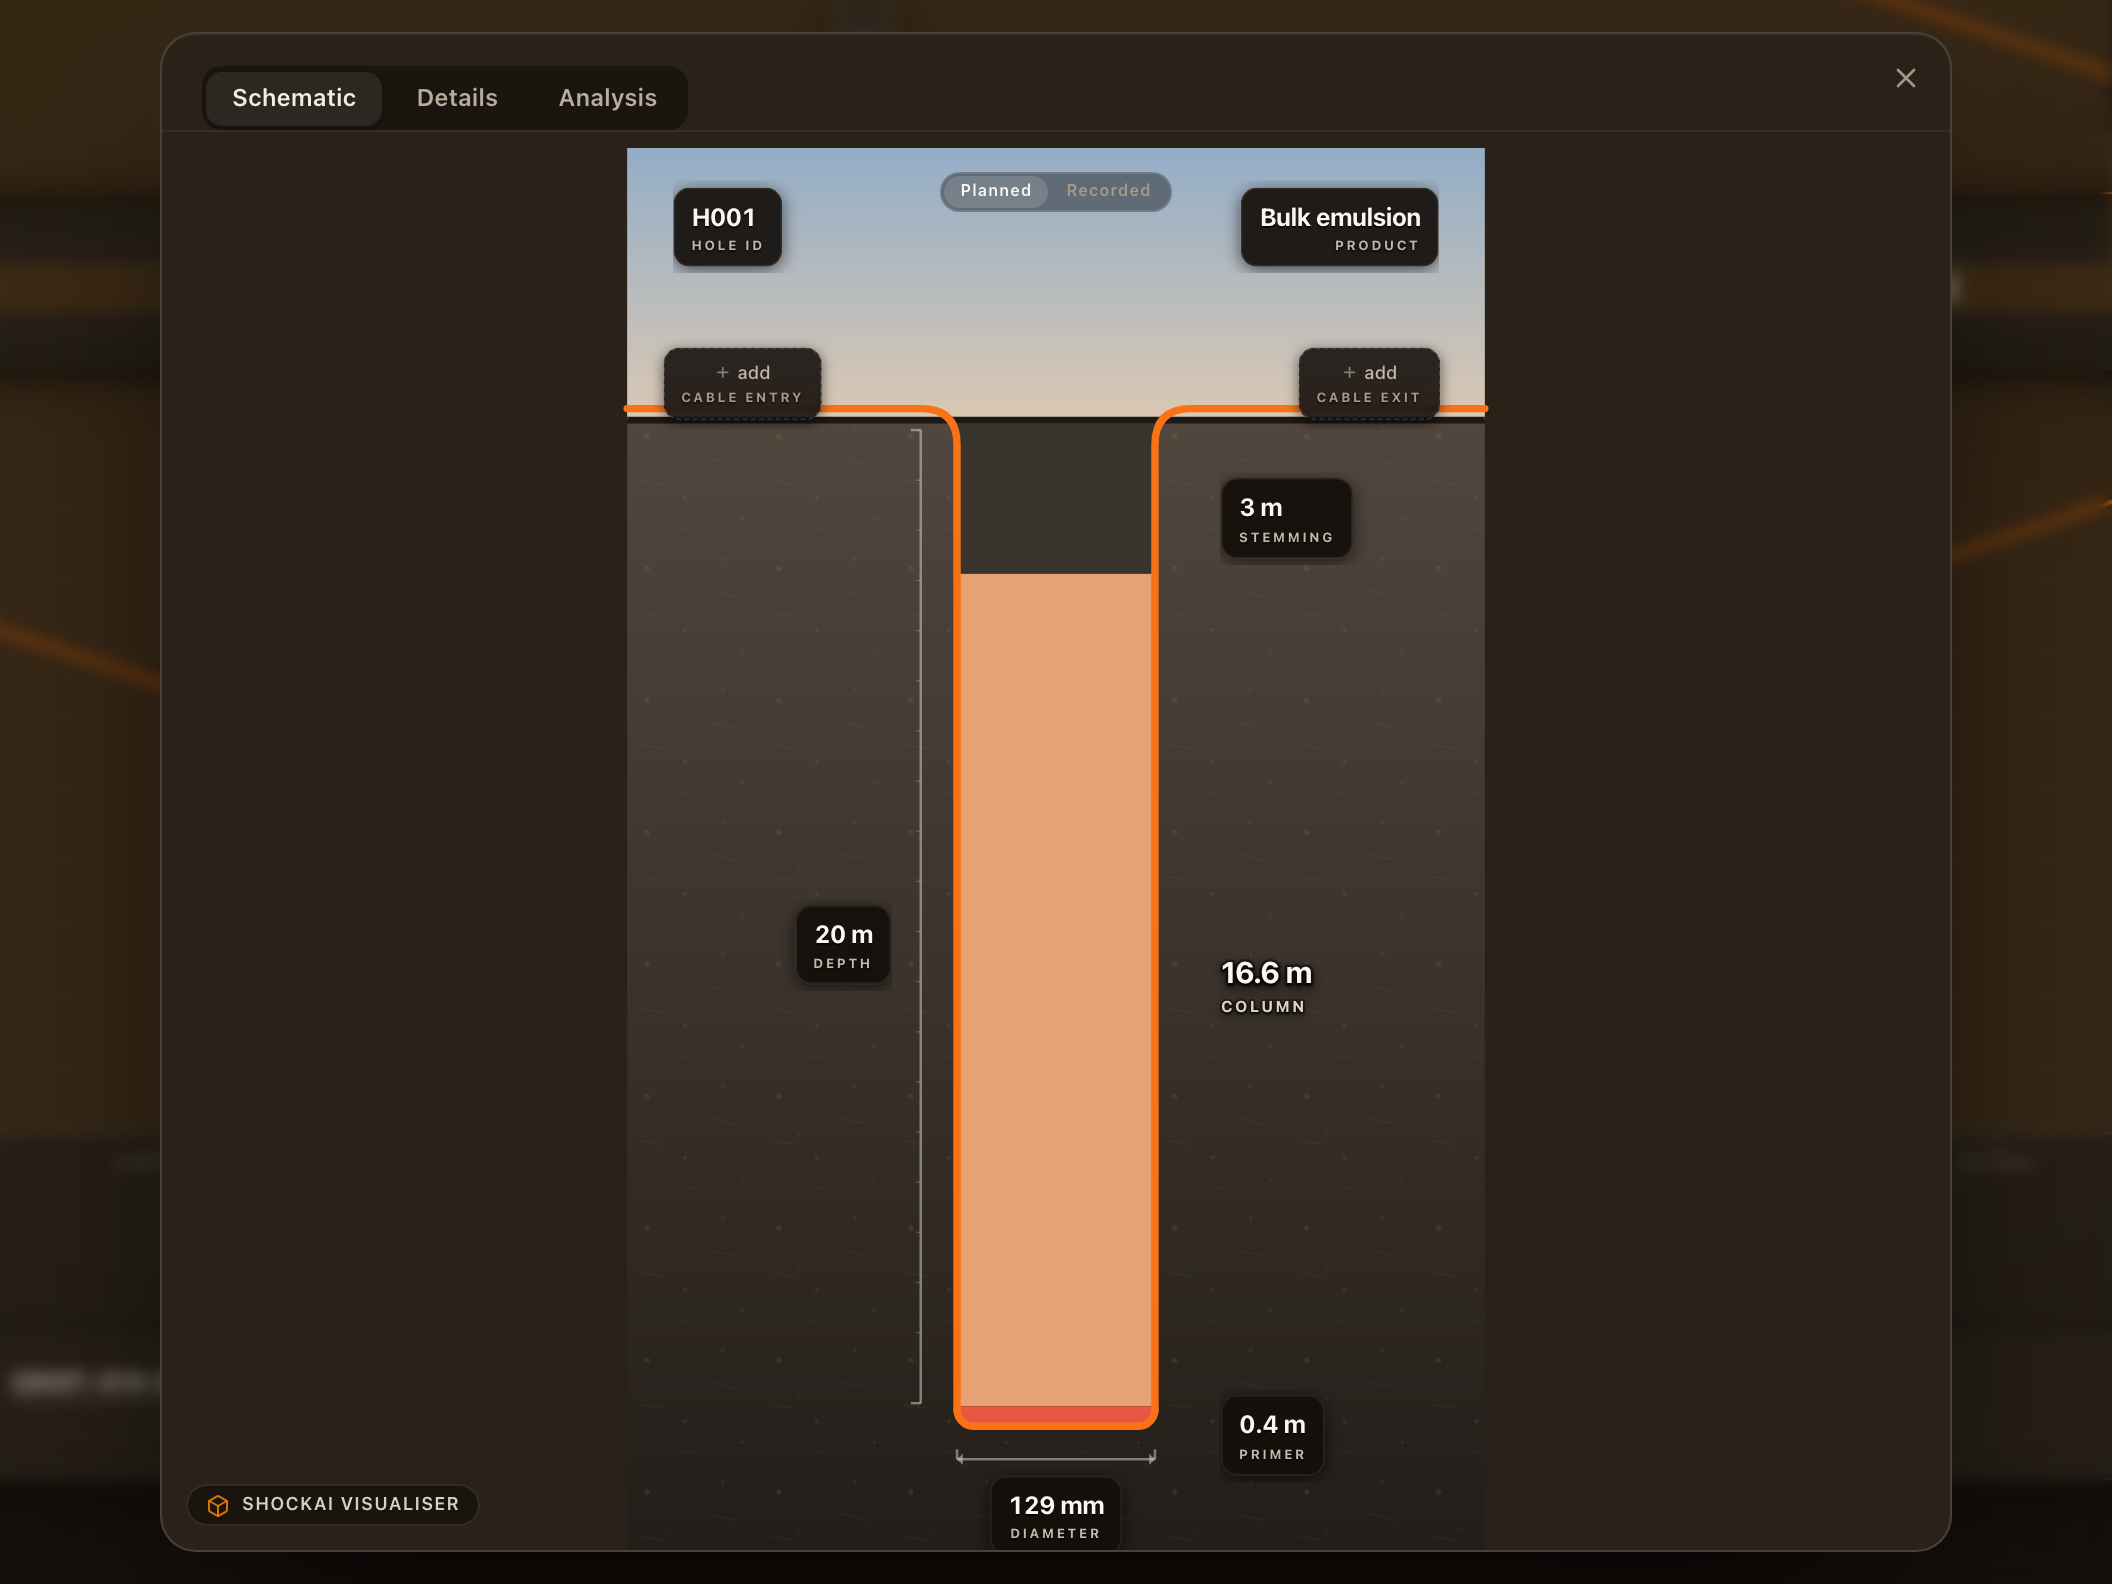
Press Enter with a hole or zone focused, or click Details on the readout, to open the hole's details in three tabs:
- Schematic: the hole in section, with its depth, stemming, primer, diameter and cable entry and exit. Click a figure to change it. Planned and Recorded switch between the design and what was measured.
- Details: every field the hole carries, from its identity and geometry to its initiation and position.
- Analysis: what the analysis read in this hole: its zones one by one, the checks it ran, and the unit's specification.
Each field saves as you change it.
Place a hole
- Press M to place a hole at the pointer on the detail chart, or at the middle of the view.
Shift+click the chart where the hole's cut is.- Or, with the Timeline showing (Shift+O), click an empty stretch of the Holes track. A dashed marker previews the hole's number as you move along it.
Each way opens New Hole, starting at that sample, with fields for its identity, geometry, charge and cable lengths. Fill in what you know and click Create. Two holes cannot start at the same sample.
To move a hole, double-click it on the Holes track and choose Continue. Drag it to its new sample, then press Esc or click elsewhere on the track to finish.
Make a zone
- Frame the stretch, by dragging across the detail chart or the Overview, and press N. Or click Add zone in What is in view.
- Or drag across an empty stretch of the Zones track. A dashed band follows the drag.
Either way opens Create zone with the start, end, times and VoD of the stretch, and an optional Name. Click Create zone to keep it.
The analyser refuses a zone before the first hole, one too narrow to measure, and one that starts on the same sample as another, and tells you which. Zones may overlap.
Edit a zone or hole
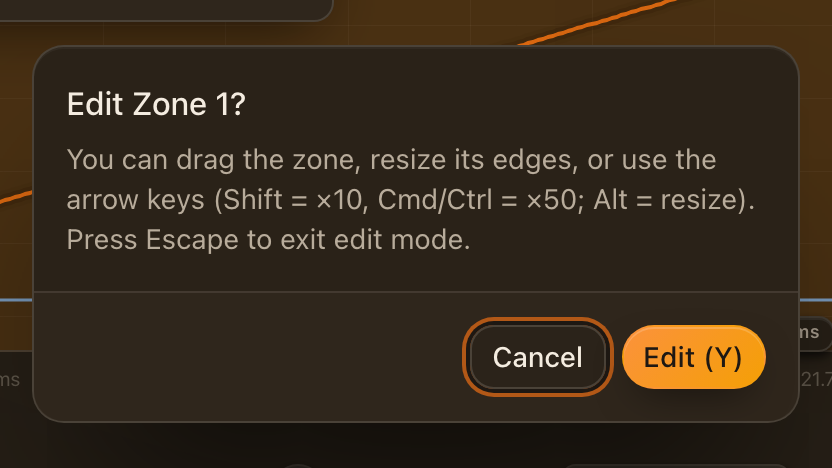
Press E with a zone or hole focused, or click Edit on the readout, and confirm with Edit (Y) or Y. Or double-click a zone on the Zones track and choose Continue. Then, on the Zones track:
- drag the zone to move it, or drag its edges to resize it;
- or use the keyboard: ← and → move it one sample, with
Shiftten and⌘/Ctrlfifty;Alt+←/→ moves its start edge, andAlt+Shift+←/→ its end edge.
A live readout gives the zone's VoD and duration as it changes. Press Esc or click outside the zone to finish: the change is saved then. Focusing another hole or zone before you finish throws the edit away.
To rename a zone, use the pencil on its row in the zones list.
The lists
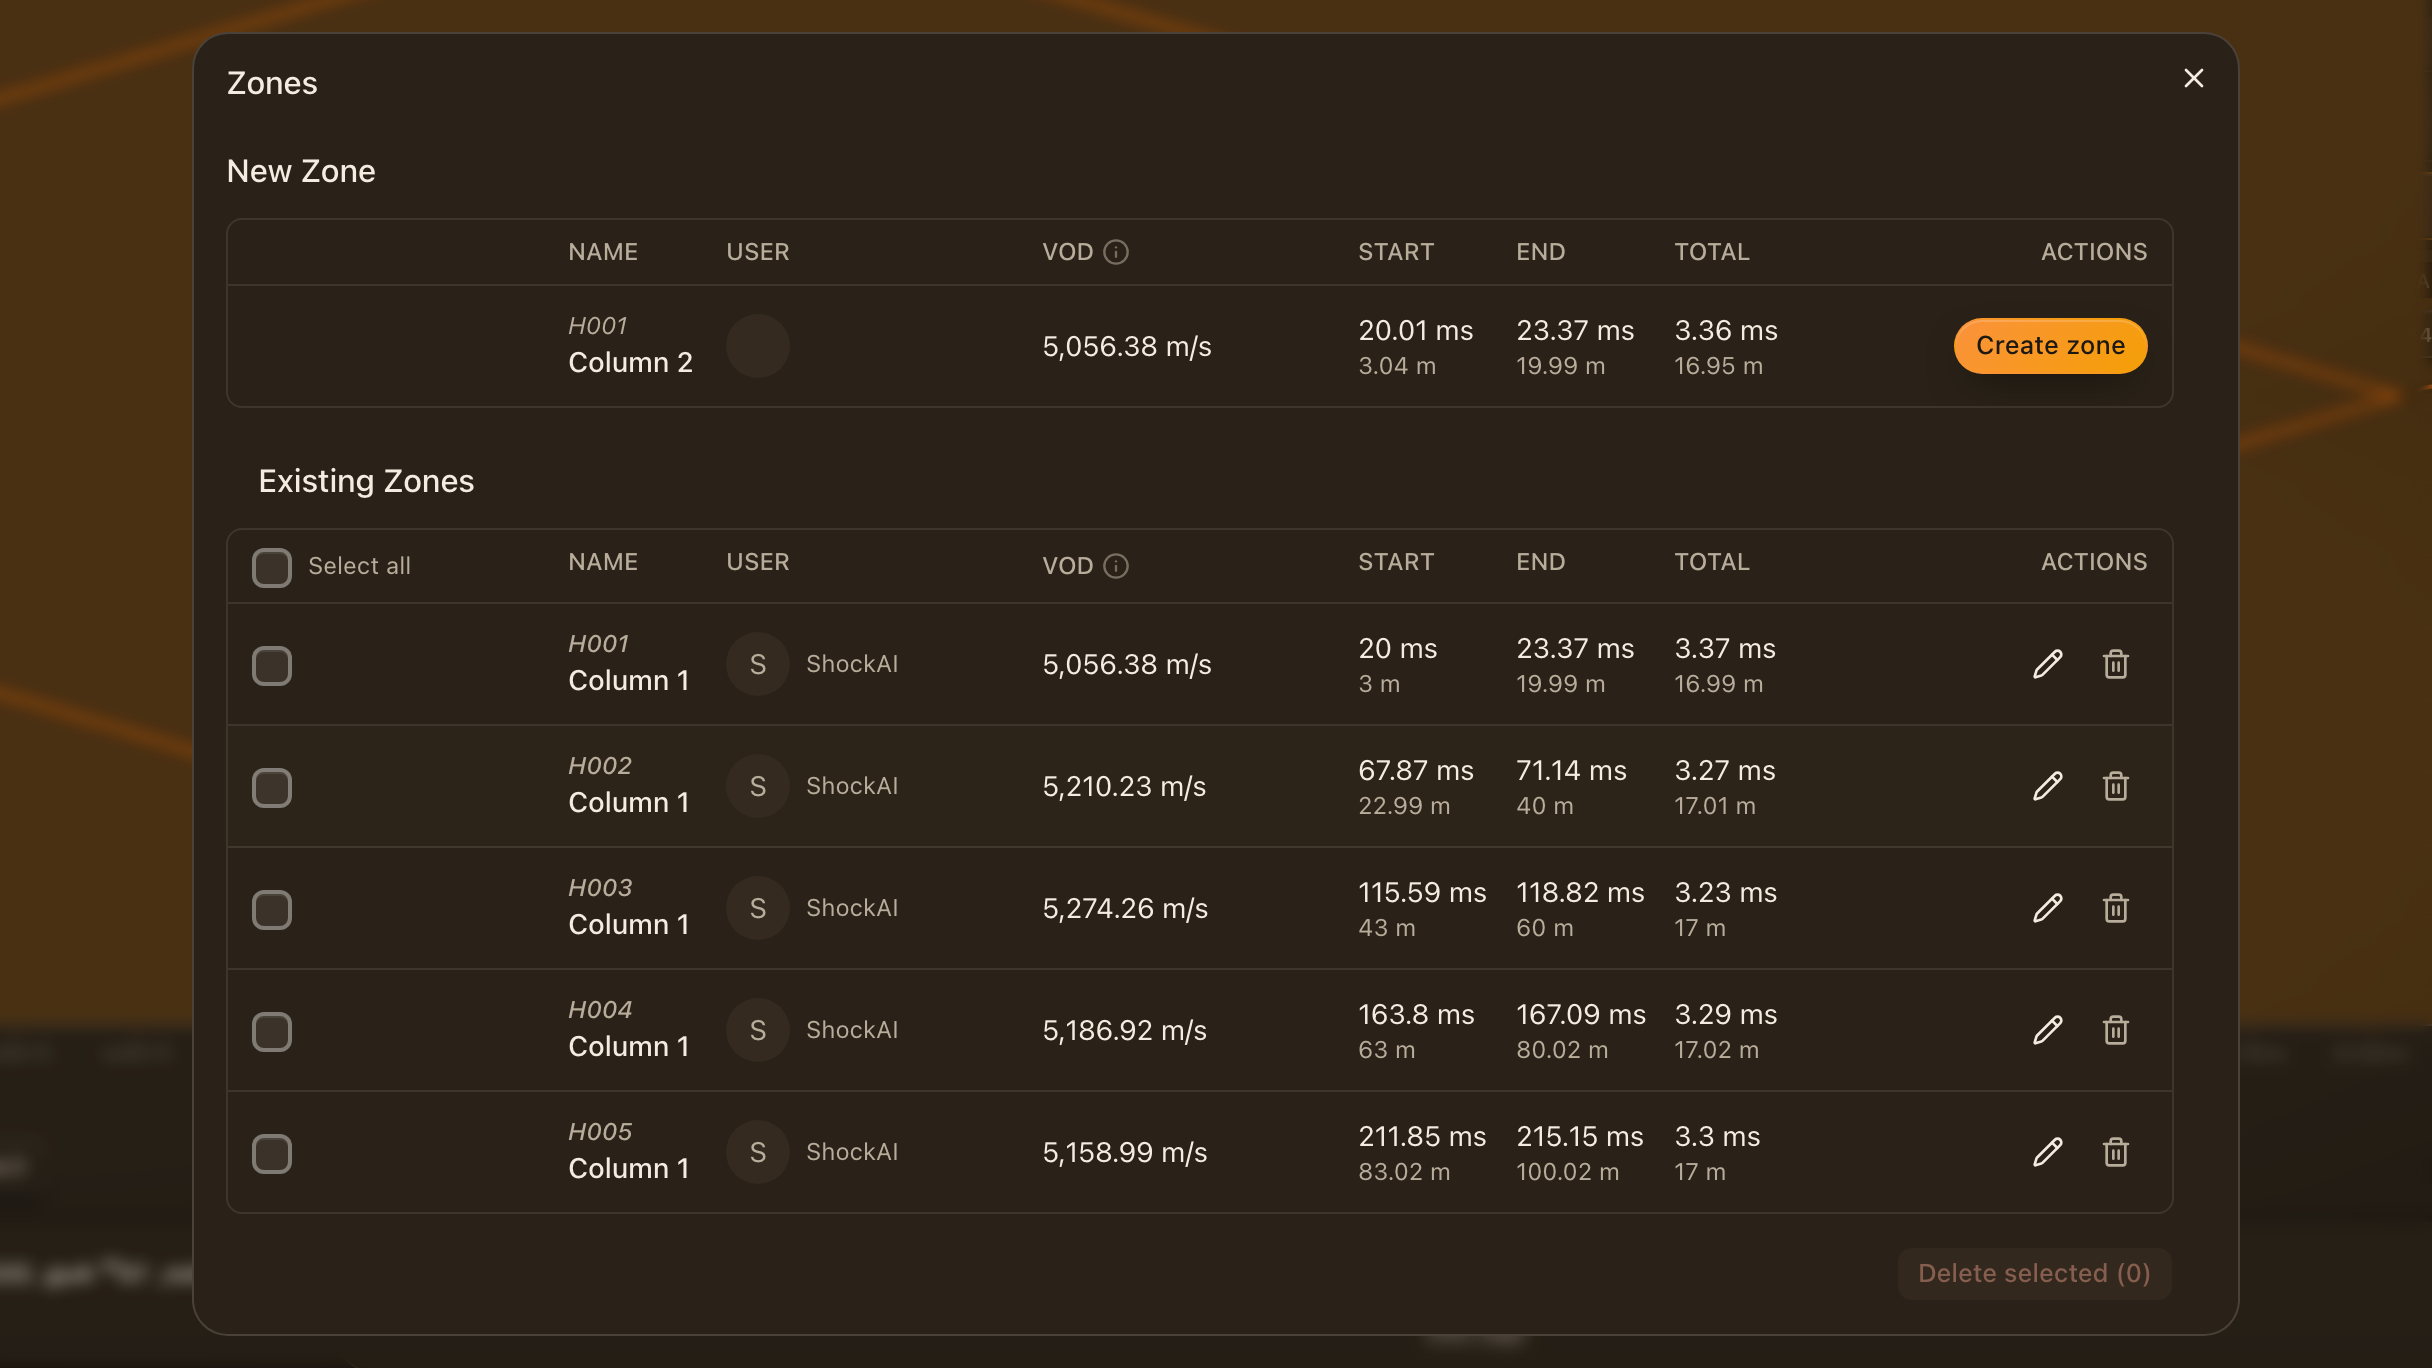
Press Shift+H for the Holes list and Shift+Z for the Zones list, or click the list icon on either track.
- Each row has a pencil to edit it and a bin to delete it.
- Tick several rows and use Delete selected to remove them together.
- With a window framed, the zones list offers a New Zone row that creates a zone from it straight away.
Undo
Press ⌘/Ctrl+Z to undo the last change to a hole or zone, and ⌘/Ctrl+Shift+Z to redo it. The analyser keeps the last fifty changes on this page, until you reload it. Deleting several rows at once from a list cannot be undone, and neither can a change to the timing settings.
The in-app Demo is read-only: an edit there is refused, and the chart goes back to how it was. The Demo project is one of your team's beta features, by invitation: an owner or admin of your team asks for it under Settings, in Beta features.